Working With Forms In Laravel 8
Using Laravel Collective
It is assumed that you already have a sufficient database and Controllers set up. If not check out my article on databases here.
As usual, you need:
XAMPP and Visual Studio Code
Let’s Get Started
While you can use natural HTML syntax, Laravel has introduced Laravel Collective, to use for forms visit here to see the full documentation.

In case you do not understand the documentation, which is understandable, I will be going through it step by step.
Installing Laravel Collective Forms
The first step is to run this in your console making sure you are in your project directory:
composer require laravelcollective/htmlOne of the things we had to do in previous versions of Laravel was to add specific providers and aliases which is very easy.
Locate your config folder in your Laravel project and in it, you will see an app.php file. In this file locate providers which should look something like
‘providers’ => [You can search for it if you want. At the bottom go ahead and paste this:
Collective\Html\HtmlServiceProvider::class,After providers, look for aliases and add the following lines at its bottom
“Form” => Collective\Html\FormFacde::class,
‘Html’ => Collective\Html\HtmlFacde::class,
And now you’re set to use forms.
Using A Form
The opening and closing form tags look like this:
OPENING TAG
{!! Form::open([‘action’ =>’App\Http\Controllers\BookController@store’, ‘method’ => ‘post’, ‘enctype’ => ‘multipart/form-data’, ‘class’ => ‘container’]) !!}THIS IS SIMILAR TO THE HTML SYNTAX BELOW
<form action=”App\Http\Controllers\BookController@store” method=”POST” enctype=”multipart/form-data”>CLOSING TAG
{!! Form::close() !!}THIS IS SIMILAR TO THE HTML SYNTAX BELOW
</form>Explanation:
The action tells us where we’re sending the form data, usually, you have a Controller resource set up with an equivalent store function and the method tells us we’re sending with POST instead of GET, the enctype and file is if you desire to upload images/files as well. And finally, you can style it up by adding a class. You can also add a route:
[‘route’ => ‘route.name’]Go ahead and begin to create your form. I will be creating a simple register form, with Name, Email, Phone Number, Password and submit button.
Using Labels
One of the most important things that often go with form components is the label tag, telling us what a particular field is for. To use a label from Laravel Collective:
Form::label(‘email’, ‘E-Mail Address’, [‘class’ => ‘awesome’]);Explanation:
<label for=”email”>Email Address</label>Let’s use HTML to explain, the first parameter is the label for as you can see and the next parameter is the actual value of the label to be displayed. If you want to style the label tag, feel free to use the next parameter.
Using Input fields
Text Inputs e.g. Name
Form::text(‘name’, ‘Jake Fisbach’, [‘class’ => ‘form-control’]);Explanation:
<input type=”text” value=”Jake Fisbach” class=”form-control”>I arranged the HTML to be in the order that the Collective’s own looks like.
Note: If you wish to bypass having a default value which I strongly recommend, leave the place empty but keep the string quotes.
Email Input
{!! Form::email(‘Email’, ‘ ‘,[‘class’ => ‘form-control’]) !!}This is similar to the HTML markup below
<input type=”email” value = ‘ ‘ class=”form-control” >Number Input
{!! Form::number(‘number’, ‘’, [‘class’=>’form-control’]) !!}This is similar to the HTML markup below
<input type=”number” value = ‘ ‘ class=”form-control”>Password Input
{!! Form::password(‘password’, [‘class’=>’awesome’]) !!}This is similar to the HTML syntax below
<input type=”password” class=”form-control”>Submit Button
This is by far the easiest to do. Especially if you’re using a controller with a resource with a store function because it will automatically make a POST request to it.
{!! Form::submit(‘Submit’, [‘class’ => ‘btn btn-success’]) !!}This is similar to the HTML syntax below
<input type=”submit” class=”btn btn-success”>As a bonus let us talk about Validation:, because it is here that we determine what fields are mandatory before submission is allowed:
VALIDATION
To the store function in your controller, which looks something like
public function store(Request $request) {}Go ahead and add these lines:‘name’=> ‘required’,‘email’ => ‘required’,‘number’ => ‘required’,‘password’ => ‘required’,
Let’s see a error or success message we can create in case of each scenario. Create a blade file and name it response i.e. response.blade,php
And paste this in
@if(count($errors) > 0)@foreach($errors->all() as $error)<div class=”alert-danger alert”>{{$error}}</div>@endforeach@endif@if(session(‘success’)) <div class=”alert alert-success”>{{session(‘success’)}}</div>@endif@if(session(‘error’)) <div class=”alert alert-danger”>{{session(‘error’)}}</div>@endif
If you are not using bootstrap, then no need for the classes mentioned here and that’s all.
Include this form file using
@include(‘path.response’)Where path is the folder where your response file is in your views folder if it’s not in the folder just type ‘response’
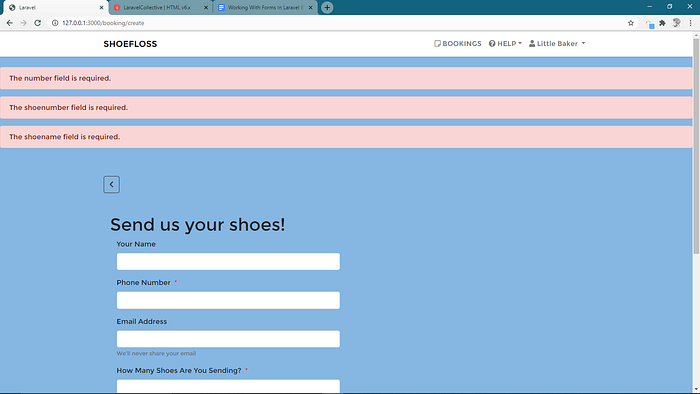
Here’s what a sample error might look like
If you want this to create a new instance in your database for instance you can do:
 $var = new Model;$var->name = $request->input(‘name’);
..after others,
$var->save();return redirect(/towhereyouwant)->(‘success’, ‘Form Submitted’);
Once again, referencing my previous article would really help with understanding this part. If you have any questions let me know.